Six months ago, I was spending nearly $300 a month on facials, serums, and skincare treatments that promised the world and delivered slightly less than that. My bathroom counter looked like a high-end pharmacy. My skin looked tired. And every morning, I’d stand in front of the mirror wondering why expensive skincare wasn’t producing the radiant, firm skin I was promised.
Then I discovered something that changed everything: my skin didn’t need more products. It needed the right technology, used consistently, in less time than I was spending on my elaborate routines.
This is the exact 10-minute LED skincare routine I’ve been following religiously for the past six months. The results have been honestly shocking. My skin is firmer. My fine lines have softened. My complexion has a glow I haven’t seen since my twenties. And I’m spending a fraction of what I used to on professional treatments.
If you’ve ever felt overwhelmed by 12-step Korean skincare routines, frustrated by the time commitment of elaborate beauty regimens, or skeptical that anything could really transform your skin in just 10 minutes a day, this article is for you. I’m going to walk you through every single step, explain exactly why each step matters, and share what I’ve learned about making LED therapy work in real life with a busy schedule.
Let me start with something important. This isn’t a routine for people who already have perfect skin and want to maintain it. This is a routine designed to actively improve your skin, whether you’re dealing with early signs of aging, dullness, occasional breakouts, uneven texture, or simply skin that doesn’t look as good as you know it could. The 10 minutes are working hard every single day to deliver real, visible changes.
Why 10 Minutes Works When 60 Minutes Often Doesn’t
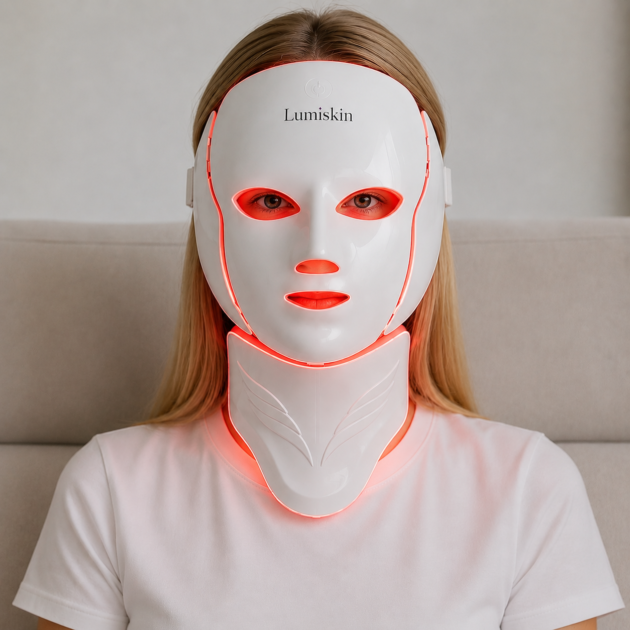
Wireless 7 Colors LED Face Neck Beauty Mask Removable Buckle Design Skin Firming Brightening Rejuvenation Anti Aging Skin Care
Before getting into the specifics of the routine, let me address the obvious question: how can 10 minutes possibly do more than the elaborate hour-long routines that fill social media feeds?
The answer comes down to two principles that took me years to truly understand. First, your skin can only absorb so much at one time. Layering 15 different products doesn’t mean your skin uses 15 different products. Most of them sit on the surface, fight with each other, or are wasted because your skin reached saturation point three products ago. Second, the most powerful skincare interventions work at the cellular level, not the surface level. And cellular changes are triggered by very specific stimuli applied consistently over time, not by piling on more ingredients.
LED light therapy hits both of these principles perfectly. It delivers specific cellular stimulation that works on the deepest layers of your skin. It works in concentrated time windows of 10 to 20 minutes. And it makes everything else in your routine work better because it improves your skin’s overall function rather than just adding more ingredients to the surface.
When I switched from my hour-long elaborate routine to this focused 10-minute approach, my results actually improved. Not stayed the same. Improved. Because instead of confusing my skin with too many competing actives, I was giving it exactly what it needed to function at its best.
Now let me share the routine.
The Routine: Overview
The full routine takes between 10 and 12 minutes from start to finish. It uses one LED face mask, three core products, and a specific sequence designed to maximize the benefits of light therapy. I do this routine every evening, six days a week, with one rest day to let my skin recover.
Here’s the quick overview before we dive into details.
Minute 1: Cleanse face thoroughly to remove makeup, sunscreen, and the day’s accumulated grime Minute 2: Pat skin dry and apply hydrating mist or essence Minutes 3 to 10: LED therapy session with appropriate color for your concern Minute 11: Apply serum to slightly damp skin Minute 12: Lock in everything with moisturizer
That’s it. Twelve minutes, six nights a week, and within 8 weeks you’ll start seeing visible changes. By 16 weeks, the changes are dramatic. By six months, people will be asking what you’ve been doing differently.
Let me walk through each step in detail.
Step 1: The Cleanse (60 seconds)
This step matters more than people realize. LED light therapy is only effective when the light can actually reach your skin. Any layer of makeup, sunscreen, dead skin cells, or environmental pollutants sitting on your face acts as a barrier that reduces how much therapeutic light penetrates to your living skin cells.
I learned this the hard way during my first month of LED therapy. I was doing my mask before bed, but I was using it after just splashing water on my face. My results were okay but not great. The moment I committed to proper cleansing before every single session, my results accelerated dramatically.
Here’s how I cleanse for maximum LED effectiveness.
If I’ve worn makeup or sunscreen during the day, which is most days, I start with an oil-based cleanser. I use a small amount of cleansing oil, massage it into dry skin for about 30 seconds, then add a tiny bit of warm water to emulsify it before rinsing. This dissolves makeup, sunscreen, and excess sebum without stripping my skin.
Then I follow with a gentle water-based cleanser. I’m currently using a glycerin-based cleanser with no fragrance and no harsh sulfates. I massage it onto damp skin for about 20 seconds, paying extra attention to my T-zone where oil and product residue accumulate, then rinse thoroughly with lukewarm water.
The double cleanse approach takes maybe 60 seconds total but ensures that my skin is completely clean before I apply light therapy. Clean skin equals maximum light penetration equals maximum results.
Three things to avoid during cleansing. Don’t use hot water, which strips your skin barrier and triggers inflammation. Don’t use harsh scrubs or aggressive exfoliating cleansers right before LED therapy, as this can leave skin overly sensitive to the light. Don’t rush this step thinking you’ll save 30 seconds, because those 30 seconds determine whether your LED session is fully effective or just partially effective.
After cleansing, I pat my face dry with a clean towel. Just pat, never rub. Wet skin is fine for the next step, but dripping wet skin makes the mask uncomfortable.
Step 2: Hydrating Prep (30 seconds)
This is the step that took me longest to understand and that makes the biggest difference in my LED therapy results.
After cleansing, before putting on the LED mask, I apply a hydrating mist or essence to my slightly damp skin. This serves multiple purposes that compound to dramatically improve results.
First, properly hydrated skin conducts light better. Dehydrated, dry skin reflects and scatters light, reducing how much therapeutic wavelength actually penetrates to where it can do its work. Skin that has a thin layer of hydration acts almost like a focusing lens, helping light reach the deeper layers more efficiently.
Second, hydrated skin responds better to cellular stimulation. The fibroblast cells that produce collagen and elastin work best when they have adequate moisture. The melanocytes that you’re trying to calm with green light therapy behave more predictably in well-hydrated skin. The bacteria-killing effects of blue light work better in moist conditions.
Third, you’ll be wearing the mask for 7 to 8 minutes. During that time, your skin should not feel tight, dry, or uncomfortable. A pre-mask hydration step ensures comfort throughout your session.
I use a hyaluronic acid essence with a few skin-friendly humectants. The product I currently love costs about $25 and lasts me three months. I spray a couple of mists onto my hand, then press it gently into my skin without rubbing. The goal is a thin, even layer of hydration, not a thick coating.
If you don’t want to invest in a separate essence, plain hyaluronic acid serum works beautifully. Apply just a few drops to slightly damp skin and pat it in lightly. The damp skin acts as a vehicle for the hyaluronic acid to penetrate, and the combination provides the perfect substrate for LED therapy.
Avoid using actives like retinol, vitamin C, or AHAs before LED therapy. These can interact with the light in unpredictable ways and may cause increased sensitivity. Save your actives for after the LED session, or use them on alternate evenings.
Now my skin is clean, hydrated, and ready for the most important step.
Step 3: LED Therapy Session (7 to 8 minutes)
This is where the magic happens. The LED therapy session is the heart of my entire routine and the reason it works so much better than my old elaborate approach.
I’ve experimented with different LED masks over the past two years, and I’ve landed on using a 7-color LED face and neck mask that covers my entire upper body including the neck area where aging shows first. The neck attachment was actually what convinced me to commit fully to this device, because I’d been ignoring my neck for years and seeing the difference in skin quality between my face and neck.
Here’s how I structure my LED sessions based on what my skin needs.
My standard evening routine uses red light for 7 to 8 minutes. Red light is the foundation of my anti-aging strategy because it stimulates collagen production and improves skin firmness. I aim for at least four red light sessions per week minimum.
When I have an active breakout, I switch to blue light for that evening. Blue light kills the acne bacteria directly and shortens the lifespan of any breakout. I use blue light only when needed because daily blue light can be slightly drying for my skin type.
When my skin looks dull or I’ve been stressed, I use yellow light. Yellow light boosts microcirculation and brings back radiance faster than any product I’ve ever used. It’s also incredibly calming for my sometimes-reactive skin.
If I’ve spent more time in the sun than I should have, I use green light to keep pigmentation under control. Green light has slowly faded a few stubborn spots I’ve had for years, particularly on my cheeks where sun damage accumulated during my twenties.
For special evenings when I want maximum benefit, I use purple light, which combines red and blue. This is my favorite for the night before important events because it works on multiple dimensions simultaneously.
During each session, I sit in a comfortable chair, listen to a podcast or quiet music, and let the mask do its work. The mask is wireless, so I’m not tethered to a plug. The 7 to 8 minute sessions feel surprisingly meditative once you get used to them. Many evenings I find myself looking forward to this quiet time as much as the skincare benefits.
The mask has a built-in timer that automatically shuts off, so I never have to worry about overusing it. The eye holes allow me to keep my eyes gently closed without straining, and the lightweight design means I don’t feel the mask weighing on my face after a few minutes.
After the mask automatically shuts off, I remove it carefully and immediately move to the next step. The window of opportunity after LED therapy is crucial.
Step 4: Serum Application (60 seconds)
There’s a 10-minute window after LED therapy when your skin’s absorption is significantly enhanced. The improved circulation and cellular activity created by the light therapy means anything you apply during this window penetrates more deeply and works more effectively than it would on regular skin. This is when I apply my treatment serum.
What serum you choose depends on your primary concerns and the color of LED you just used. I’ll share my current approach, but yours might be different based on your skin.
For my evenings using red light, I follow up with a peptide serum. Peptides are short chains of amino acids that signal your skin to produce more collagen, and they work synergistically with the collagen-stimulating effects of red light. The combination is significantly more effective than either treatment alone.
For evenings using blue light during breakouts, I follow with a niacinamide serum. Niacinamide regulates oil production, reduces inflammation, and helps prevent the marks that often remain after blemishes heal. It complements the antibacterial action of blue light perfectly.
For evenings using green light for pigmentation, I use an alpha-arbutin or kojic acid serum. These ingredients work on melanin production through different pathways than the green light, creating a multi-angle attack on pigmentation that produces faster results than any single approach.
For yellow light evenings focused on radiance, I sometimes use a vitamin C serum. While I generally save vitamin C for mornings, after yellow light therapy my skin tolerates it well, and the combination produces a visible glow that lasts for days.
I apply my serum to skin that’s still slightly damp from the pre-mask essence. I use just a few drops, warmed between my palms, and pressed gently into my skin. I don’t rub. The goal is to deliver the actives without disrupting the cellular processes happening at this critical moment.
I avoid retinoids on LED therapy evenings. Retinoids and red light therapy both work on cell turnover and collagen production, and using them together can be overstimulating for some people. I save my retinoid for non-LED evenings, which is one reason I take one rest day per week from LED therapy.
The serum step takes 60 seconds at most, but it’s during this window that I’m making sure all the cellular work the LED therapy started gets properly supported with the right ingredients.
Step 5: Lock It In (60 seconds)
The final step seals everything into my skin and protects against overnight moisture loss. I use a moisturizer chosen specifically to work well after LED therapy.
What works best is a moisturizer with ceramides, fatty acids, and cholesterol. These ingredients support your skin barrier function, which is what allows everything you just applied to actually stay in your skin and continue working overnight. A weak barrier means your products evaporate or migrate, while a strong barrier means everything stays exactly where it needs to be.
I use a richer moisturizer in the evening than I do in the morning. The night formula I love is unfragranced, contains ceramides, has some lipid-replacement ingredients, and feels comfortable without being heavy or greasy. It costs about $30 and lasts me about two months.
For the eye area, I use a separate eye cream. The skin around the eyes is significantly thinner than the rest of your face, and using a regular face cream can sometimes feel too heavy for this delicate area. A specifically formulated eye cream addresses both moisturizing needs and the unique concerns of the eye area like dark circles and crow’s feet.
I take my time with this step, gently massaging the moisturizer into my skin with upward motions. The light massage stimulates circulation, which complements what the LED therapy already started. Two minutes of careful application is far more effective than 30 seconds of haphazard slathering.
The moisturizer also adds a final protective layer that prevents the actives from your serum from oxidizing or evaporating overnight. Without proper moisturizer to lock everything in, even the most expensive serum is significantly less effective than it could be.
The Morning Routine That Complements the Evening LED
The 10-minute evening LED routine works best when paired with a smart morning routine that doesn’t undo the work being done at night. My morning routine takes about 5 minutes and serves to prepare my skin for the day while preserving the cellular changes happening because of LED therapy.
I wash my face with just lukewarm water in the morning, no cleanser. The lipids and beneficial ingredients I applied the night before are still working, and using a cleanser would wash them away.
I apply a vitamin C serum, which provides antioxidant protection from environmental damage throughout the day. Vitamin C in the morning complements the collagen production triggered by red light in the evening, addressing skin renewal from multiple angles.
I follow with a lightweight moisturizer suitable for daytime use. Different from my night moisturizer, this one is lighter and absorbs quickly without feeling heavy under makeup.
Finally, and most importantly, I apply broad-spectrum SPF 50 sunscreen every single morning, regardless of weather, season, or whether I plan to leave the house. This step is non-negotiable. LED therapy improves your skin, but UV damage erodes your skin faster than therapy can repair it. The two together create a maintenance gap that means no progress. Sunscreen plus LED therapy together create exponential improvements.
The morning routine takes 5 minutes. The evening routine takes 12 minutes. The total daily skincare commitment is 17 minutes, which is significantly less than my old elaborate routine while delivering dramatically better results.
The Weekly Rhythm That Maximizes Results
Beyond the daily routine, I’ve developed a weekly rhythm that prevents my skin from getting accustomed to any single stimulus and ensures comprehensive results.
Monday I use red light for collagen production. I’m starting the week with an anti-aging focus.
Tuesday I use red light again, sometimes followed by my peptide serum, sometimes by a hydrating mask after the LED session.
Wednesday I switch to yellow light for radiance. This mid-week brightness boost keeps my complexion looking refreshed.
Thursday I use red light again, maintaining my anti-aging foundation.
Friday I use purple light or sometimes green light depending on what my skin needs that week. Friday is also when I apply a more intensive overnight mask after my LED session for amplified weekend recovery.
Saturday I either use red light again or take a rest day depending on how my skin feels. If I’ve been particularly stressed during the week, I sometimes use yellow light for an extra calming session.
Sunday is my rest day from LED therapy. On Sundays, I apply a retinoid serum and a deeply nourishing mask. The retinoid wouldn’t interact well with same-day LED therapy, so this is the day to incorporate it into my routine without conflict.
This weekly pattern provides comprehensive coverage across multiple skin concerns while preventing any single wavelength from becoming the only thing my skin experiences. Variety keeps cellular processes activated in different directions, and the rest day allows for full recovery and integration of all the changes happening throughout the week.
The Skincare Products That Actually Matter
Over six months of this routine, I’ve narrowed down my essential products to a small list of ingredients that genuinely make a difference when combined with LED therapy.
A gentle hydrating cleanser is essential. Look for something fragrance-free with humectants like glycerin or hyaluronic acid. Avoid anything with sulfates, fragrances, or harsh exfoliants. The cleanser should leave your skin clean but never tight.
A hyaluronic acid essence or hydrating mist provides the perfect substrate for LED therapy. The hydration layer conducts light better and ensures your skin can use the cellular stimulation effectively.
A peptide serum or two complementary serums for specific concerns deliver targeted ingredients during the optimal post-LED absorption window. Don’t use too many. Two serums at most, applied to clean post-LED skin, will outperform six serums applied randomly throughout an elaborate routine.
A barrier-supporting moisturizer with ceramides locks everything in and supports overnight skin recovery. Skip the trendy ingredients and focus on what your skin barrier actually needs.
A broad-spectrum SPF 50 sunscreen for daily use protects all the work LED therapy is doing. Without this, you’re working against yourself every day.
That’s it. Five products plus the LED mask. Compared to the 18 products in my previous routine, this is dramatic simplification. And it delivers far better results.
Realistic Timeline: What to Expect Week by Week
When I started this routine six months ago, I wish someone had given me a realistic timeline of what to expect. Instead, I had vague hopes that didn’t match reality and almost gave up before the real results appeared. Let me save you that uncertainty.
In the first two weeks, you’ll likely feel some changes but not see dramatic visible differences yet. Your skin will feel a little softer. The texture might feel more refined. You might notice your makeup goes on more smoothly. The big visible changes are happening at the cellular level, where collagen production has accelerated but the new collagen hasn’t yet had time to make a visible difference on the surface.
In weeks three and four, the visible changes start. Your skin will look subtly brighter. Your complexion will appear more even. If you’ve been dealing with breakouts, you’ll notice fewer new ones forming. Fine lines won’t be dramatically different yet, but the overall quality of your skin will be noticeably improving.
By weeks six and seven, you’ll start hearing comments from people who see you regularly. “Your skin looks great” or “Did you change something?” These are the comments that confirm your routine is working. You’ll see visible firming in your jawline and cheek areas. Fine lines will look softer. The overall texture and tone will be significantly improved compared to where you started.
Between weeks eight and twelve, the changes become unmistakable. When you look at photos from before you started this routine, the difference is dramatic. Skin firmness is visibly improved. Your complexion has a glow that doesn’t come from makeup. Any acne scars or hyperpigmentation has visibly faded. You’re seeing the benefits LED therapy can really deliver when used consistently.
By month four to six, you’re in maintenance mode. The transformation has been substantial. Your skin looks not just better, but actually younger and healthier. People who haven’t seen you in a few months are noticing immediately. You’ve found that your skincare investment is paying off in ways that traditional products never managed to deliver.
After six months, ongoing use produces ongoing improvements. The benefits compound. The skin you have in month twelve is better than the skin you had in month six, which was already dramatically better than where you started.
This is the timeline of real results. Not the unrealistic expectations of skincare ads. Not the disappointment of products that don’t deliver. Real, measurable, photograph-able improvements that build over time when you commit to a routine that actually works.
The Mistakes I Made That Almost Killed My Results
I want to share the mistakes I made early in my LED therapy journey so you can avoid them and get to results faster than I did.
I started inconsistently, doing the mask three times one week, twice the next, then forgetting for almost two weeks during a busy travel period. The inconsistent use meant I wasn’t getting the cellular stimulation needed for real change. When I committed to the routine six nights a week without exception, even on busy days, the results accelerated dramatically.
I applied serums before my LED session, thinking they’d be activated by the light. In reality, the serums were creating a barrier that prevented the light from penetrating properly. Once I switched to a clean-skin approach with only hydrating essence before the mask, my results improved substantially.
I tried to do everything every night. Vitamin C, retinoids, peptides, hydration, brightening serums, all applied together after my LED session. My skin got overwhelmed and started getting reactive. When I simplified to one or two targeted serums per evening, my skin responded much better.
I skipped sunscreen on cloudy days or days when I wasn’t planning to go outside. Even brief sun exposure through windows or quick errands without sunscreen was undoing days of LED therapy progress. Daily SPF 50 became non-negotiable.
I expected results too quickly. After three weeks, I almost gave up because I wasn’t seeing the dramatic transformation I’d hoped for. If a friend hadn’t encouraged me to commit to a full 12 weeks, I would have abandoned the routine right before the real visible changes started.
I tried too many LED colors initially. I was using a different color every night, never giving my skin consistent enough exposure to any single wavelength to see meaningful results. When I focused primarily on red light with occasional sessions of other colors for specific needs, I started getting real benefits.
These mistakes set my results back by about three months. By sharing them, hopefully you can avoid the same delays and see your transformation faster than I did mine.
Adapting the Routine to Different Skin Types
This routine works for most skin types with minor adjustments. Here’s how I’d modify it for different needs.
For oily and acne-prone skin, lean more heavily on blue light during the active phases of breakouts. Use a lighter moisturizer that focuses on barrier support without adding heavy oils. Niacinamide serum is particularly valuable. Reduce frequency of red light slightly during active breakout periods to once per week, returning to four times per week once breakouts clear.
For dry skin, focus most evenings on red light, which improves the skin’s natural moisture retention. Add a hydrating serum step before your peptide serum after LED therapy. Use a richer moisturizer with both ceramides and natural oils. Consider doing yellow light sessions more frequently, as it improves circulation that brings nutrients and moisture to dry skin.
For sensitive skin, start with yellow light only for the first two weeks to ensure your skin tolerates LED therapy well. Use cyan light for any redness or reactive periods. Avoid layering multiple serums. Stick to one fragrance-free serum and one barrier-supporting moisturizer. Use the LED mask only three to four times per week rather than six.
For mature skin showing visible signs of aging, use red light five to six times per week for the first 12 weeks to maximize collagen production. Add purple light sessions twice weekly for combined benefits. Use a peptide serum every evening after LED therapy. Consider doing 15-minute LED sessions instead of 7 to 8 minutes for slightly more intensive treatment.
For combination skin, vary your LED colors and serums based on which area of your skin needs the most attention that week. The flexibility of having a 7-color mask is particularly valuable for combination skin because different areas often need different approaches.
For young skin in your twenties wanting prevention, three red light sessions and one yellow light session per week provides comprehensive prevention without overdoing it. Focus on consistency over intensity, as you’re building habits that will pay off enormously over decades.
The Mental and Emotional Benefits I Didn’t Expect
Beyond the visible skin improvements, this routine has given me something I genuinely didn’t expect: a daily ritual of self-care that has become one of my favorite parts of every day.
The 12 minutes I spend each evening with my LED mask have become a transition between the busy day and restful evening. I close my eyes during the LED session and let my thoughts settle. The quiet glow of the mask, the gentle warmth, the knowledge that something beneficial is happening for my skin, all combine to create a meditative pause in my day that I look forward to.
I’ve started using this time to listen to audiobooks I never had time for before. Twelve minutes a night adds up to over an hour of reading per week. I’ve finished books I never would have made time for otherwise.
The routine has improved my sleep. The consistent evening practice signals to my body that the day is winding down. I fall asleep faster and sleep more deeply since starting this routine. Whether this is from the LED therapy itself or simply from having a consistent evening ritual, the effect is real.
I feel more in control of my appearance and aging. Rather than feeling like I’m fighting a losing battle against time, I feel like I’m actively investing in my skin’s future every single day. Twelve minutes is a small price for that sense of agency over my own appearance.
The compliments from friends, family, and even strangers have been genuinely heartwarming. People asking what I’ve been doing differently, complimenting my skin, asking for recommendations, all of this has been a delightful surprise. I’m not vain about my appearance, but feeling confident in my skin has positively affected how I show up in other areas of my life.
What Six Months of Consistent LED Therapy Has Taught Me
Looking back over the past six months, here are the most important lessons I’ve learned about skincare that I wish I’d known years ago.
Consistency matters infinitely more than intensity. A modest routine done consistently every evening will produce dramatically better results than an elaborate routine done sporadically. The cellular processes that transform your skin happen over time with regular stimulation, not from sudden intense treatments.
Less is more once you’re using the right things. My old elaborate routine was actively making my skin worse by overwhelming it with conflicting actives. The simplified routine with LED therapy at its center has produced results that years of expensive skincare never delivered.
Technology has surpassed many traditional skincare approaches. The LED therapy that used to require expensive professional appointments now works equally well at home, in less time, at a fraction of the cost. Anyone still relying purely on topical products is leaving real benefits on the table.
Patience produces results, impatience destroys them. Switching products every few weeks, abandoning routines before they have time to work, jumping between trends, all of this prevents you from ever seeing what consistent care can actually deliver.
Your skin reflects your lifestyle far more than your products. Adequate sleep, hydration, stress management, and nutrition affect your skin appearance more than any cream. LED therapy works with these foundational habits, not against them.
The investment in good tools pays off long-term. A quality LED mask costs about as much as one really good facial treatment, but it provides daily benefits for years. The math heavily favors investing in the right device once over paying for repeated professional appointments.
Self-care doesn’t require expensive ingredients or elaborate routines. It requires consistent attention, the right tools, and the patience to let real changes happen over time. Twelve minutes a day has fundamentally transformed how my skin looks and how I feel about it.
Making This Routine Work for Your Life
The reason this 10-minute LED routine has worked for me is that it’s actually realistic for a normal life with normal commitments. Here’s how to make it work for yours.
Pick a time that integrates naturally with your existing evening habits. For me, it’s right before brushing my teeth. For others, it might be during the news or before reading in bed. The key is anchoring the routine to something you already do every evening so you don’t have to remember it separately.
Keep your products on the bathroom counter or wherever you do your routine. If you have to dig through a drawer or cabinet to find your products, you’ll skip them on tired evenings. Visibility creates consistency.
Have a backup plan for travel and busy nights. I keep a smaller LED device for travel and have a 5-minute abbreviated version of my routine for nights when I’m truly exhausted. The abbreviated routine still includes cleansing, LED therapy, and basic moisturizer. Even on the busiest nights, this minimum can be done.
Track your progress with photos every two weeks. Take photos in the same lighting, at the same time of day, with no makeup. The progress shown in side-by-side comparisons is often more dramatic than what you notice day-to-day in the mirror. Tracking progress visually keeps you motivated through the slower initial weeks.
Be patient with yourself if you miss days. Missing a day or two doesn’t ruin your results as long as you return to consistency promptly. What matters is the overall pattern of consistent use over months, not perfection.
Don’t try to add too many other changes at once. If you’re starting LED therapy, focus on that for at least 8 weeks before adding new skincare elements. Too many simultaneous changes make it impossible to identify what’s working and what isn’t.
Find a way to enjoy the time. Whether it’s audiobooks, music, a podcast, or simply quiet meditation, make the 7 to 8 minutes of LED therapy something you look forward to rather than something you endure. The routine you enjoy is the routine you’ll maintain.
The Bottom Line on 10-Minute LED Routines
Six months ago, I would have laughed at the idea that 10 to 12 minutes could deliver better results than my hour-long elaborate routine. I would have been wrong.
The science of LED light therapy is real. The technology is now accessible at home. The combination with a few well-chosen products and consistent application produces results that traditional skincare alone simply cannot match.
This isn’t a quick fix. The first two weeks won’t transform your skin. The first month will show subtle improvements. But by month three, the changes are visible. By month six, they’re dramatic. By month twelve, your skin will be in a different category than where it started.
Twelve minutes a night, six nights a week, plus a five-minute morning routine, equals about two hours per week of focused skincare. That’s less time than most people spend on social media in a single day. The return on that time investment is some of the most significant skincare results possible without invasive procedures.
The brighter, firmer skin you want is achievable. The path to it is simpler than you’ve been told. The tools and ingredients exist to make it happen. What’s required is the commitment to consistent, intelligent care over time.
Start tonight with a proper cleanse, a hydrating mist, your LED therapy session, a targeted serum, and a quality moisturizer. Do it again tomorrow night. And the night after that. Eight weeks from now, you’ll see why this routine has fundamentally changed how I think about skincare.
The skin you want isn’t a fantasy. It’s the natural result of giving your cells what they need to function optimally, day after day, week after week, until the cumulative effect becomes visible. Twelve minutes a night is the entry fee. The dividends pay out for years.
Your skin is your largest organ, exposed to environmental stresses every single day for your entire life. Taking 12 minutes to actively support its function and renewal isn’t vanity. It’s basic self-care that produces visible, lasting benefits in how you look and how you feel about yourself.
The best time to start was a decade ago. The second-best time is tonight. Your 10-minute LED skincare routine for brighter, firmer skin is waiting. All you have to do is begin.